Embarking on the journey of van life as a solo female comes with its own set of challenges and triumphs. One of the most crucial aspects of van life is ensuring a sustainable power source and proper ventilation within the confined space of your tiny home on wheels. In this comprehensive guide, I'll take you through my experience of installing 420 watts of solar power and a manual Maxx air Fan on the roof of my van as a solo DIY builder.
PART 1: Installing the Maxx Air Fan ~ a well-ventilated van is essential for comfort and moisture control, for both Mikee and I, but especially her, I always worry about her on overly hot days, even though she will ALWAYS find the hottest spot in the van...cats, ifkyk. I didn't install air conditioning due to space constraints on my roof for adding more solar panels to power an AC unit, so I went with the well researched Maxx Air Fan, and so far it's done the job. I make a point of not staying anywhere where the temps get over 80 degrees, and if it does I seek out cooler spots or park in the shade with an ocean breeze which cools the van considerably. That's the beauty of living in a van, I can move my home whenever I want/need to.
A detailed video of the information below is also on YouTube.
I bought the Maxx Air Fan on Amazon, links to all the products used at the bottom of this post. I didn't get the Maxx Air Fan with a remote, since I only have a medium height roof and can easily reach the controls. Plus, one less thing to break and deal with, which is a big part of my van build keeping it practical, and minimalist in design.
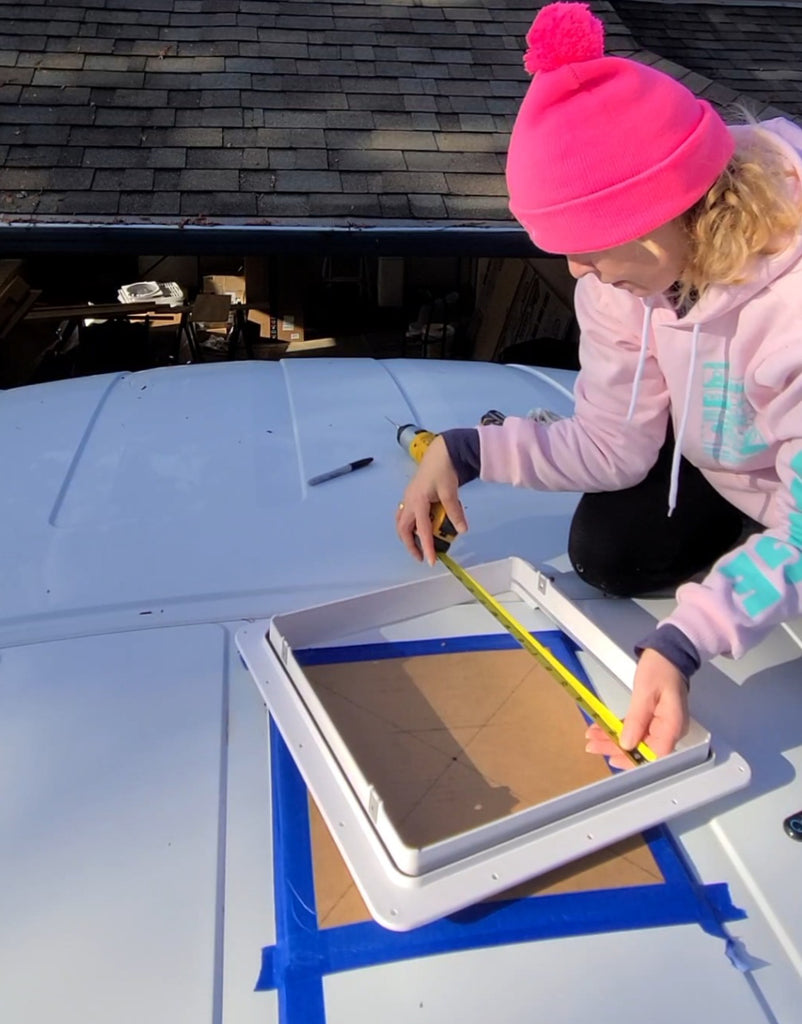
I started out by creating a 14"x14" cardboard template, and then determining where to place the fan on my roof. I have (2) 210 watt solar panels, so I went ahead and measured them to make sure all three pieces would fit up there. I ended up putting the solar panels all the way to the back, and the fan forward. This just makes sense as I have a bunk window, with a slider and screen, on the back wall of the passenger side, and then another just behind the drivers seat on that wall. This will allow for good cross ventilation throughout the van.
Before doing any drilling, or cutting of the metal, I created a catch all from the inside of the van with some plastic taped up so that no metal shavings would end up all over inside the fan...lifesaver! I taped the template down first and drilled through the center to use as a bearing to get it exactly where I wanted, and measured and remeasured to make sure everything would line up just right. Then used painters tape to outline exactly where I wanted to cut. I predrilled holes so that I could get the jigsaw blade down into the metal at various points to make for easier cutting. Then it was time to cut a big ole hole in the roof of my van...scaaarrrry!! I've never cut metal before, let alone in the roof of my future home! But, it had to be done, so, I just dove right on in. As I was cutting I would periodically stop and attach tape to the van and the cut parts, just so that the cut pieces didn't drop down and make it harder for me to cut the rest. Basically like having an extra set of hands holding it in place. Popped the piece out and remeasured again just to make sure all was good...it was!
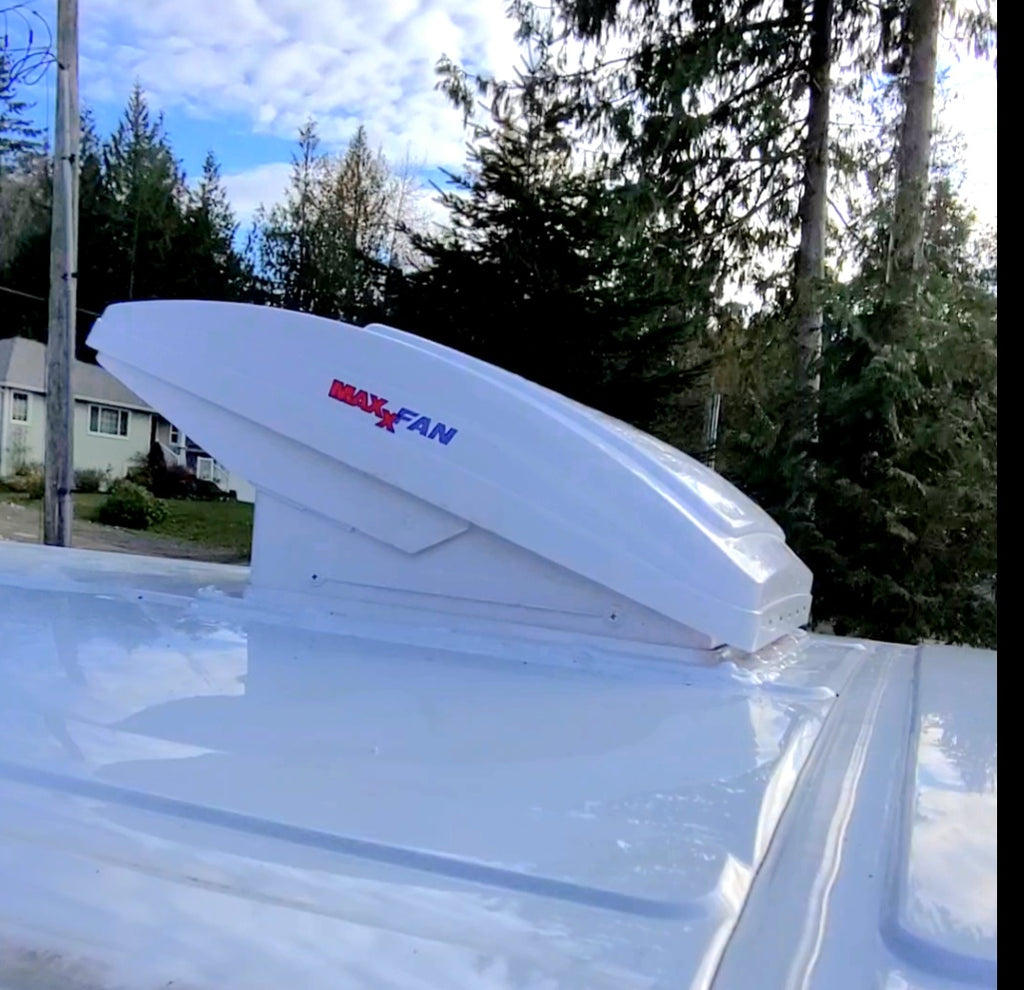
I cleaned up all the metal shavings and used rubbing alcohol to thoroughly clean the metal where I would be applying the Rustoleum rust paint, and then again clean it for the butyl tape application, for best adhesion. Before painting the edges I used a metal file to file down any sharp edges and make it a fairly smooth cut edge. Next step was to take the Rustoleum paint and paint the exposed edges of metal to prevent any rust issues. Once that dried I applied butyl tape all along the edge where the fans flange would go. I then followed the outside edge of the tape with some Dicor Lap Sealant for extra adhesion and also to prevent any leaks where the screws drilled into the van itself; and two years later and no leaks, so yay! Next it was time to mount the flange. I first lined it up exactly with the hole, and rested it on top of the butyl tape. I then predrilled all the holes down through the tape, and the vans roof, then screwed it down nice and snug. Finally mounted the fan, with the vented area facing backwards, where the lid opens up. And screwed it down to the flange with the four provided screws. The final step was to generously apply even more Dicor lap sealant all the way around the edges, and over the screws to prevent any leakage issues. And voila, all done and the fan was installed and works like a champ!
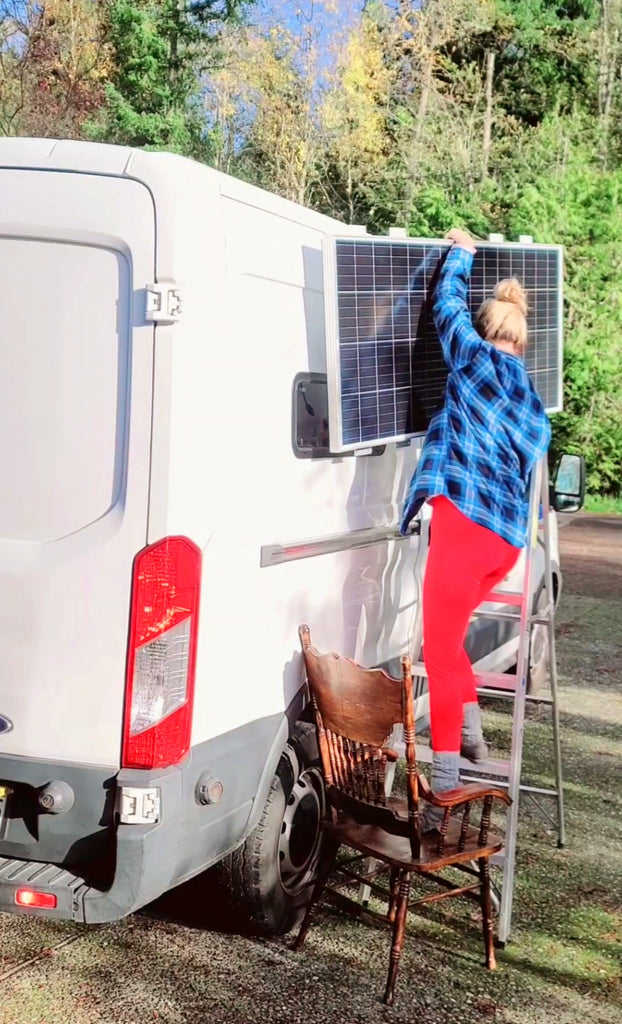
PART 2: Mounting Solar Panels to the Roof of My Ford Transit Van
I wanted to get the solar panels securely in place before the PNW winter weather set in and made climbing onto an icy metal roof hazardous. I strategically placed the two Newpowa 210 watt panels on the van roof, taking into consideration where my Maxx Air Fan was (first thing I installed on the van) and where the wires for the panels would need to go through the roof to attach them to the battery system which would be on the rear passenger side of the van in the back storage area underneath the bed. I found the perfect, robust Renogy brackets to ensure the panels could withstand the rigors of life on the road.
I have a detailed video on YouTube showing how I mounted the brackets onto the panels and installed the solar panels directly on my Ford Transit roof. I didn't end up going with a roof rack simply because I didn't need it just for the roof panels, since nothing else was going onto the roof except for the Maxx Air Fan. And so far it's worked out great, no issues at all by directly mounting to the roof with the Renogy brackets.
For my van build solar system I went with (2)210 watt Newpowa solar panels, purchased off Amazon (link below), and a Zooms 200ah lithium battery. I knew I wasn't planning on running a whole lot off my system - just my fan, an Itty bitty usb fridge, laptop, and charging phones, etc, read my other van build blog post on the electrical system and my power need calculations. So, this has more than sufficed, if not I can always add another battery, and portable/foldable solar panels, or a portable solar powered battery station such as Jackery or Bluetti. But two years into van life, and this system has been more than enough to power my home on wheels. I haven't spent any time in colder climates while living in the van, and also in the summers I don't spend a lot of time in hot temps.
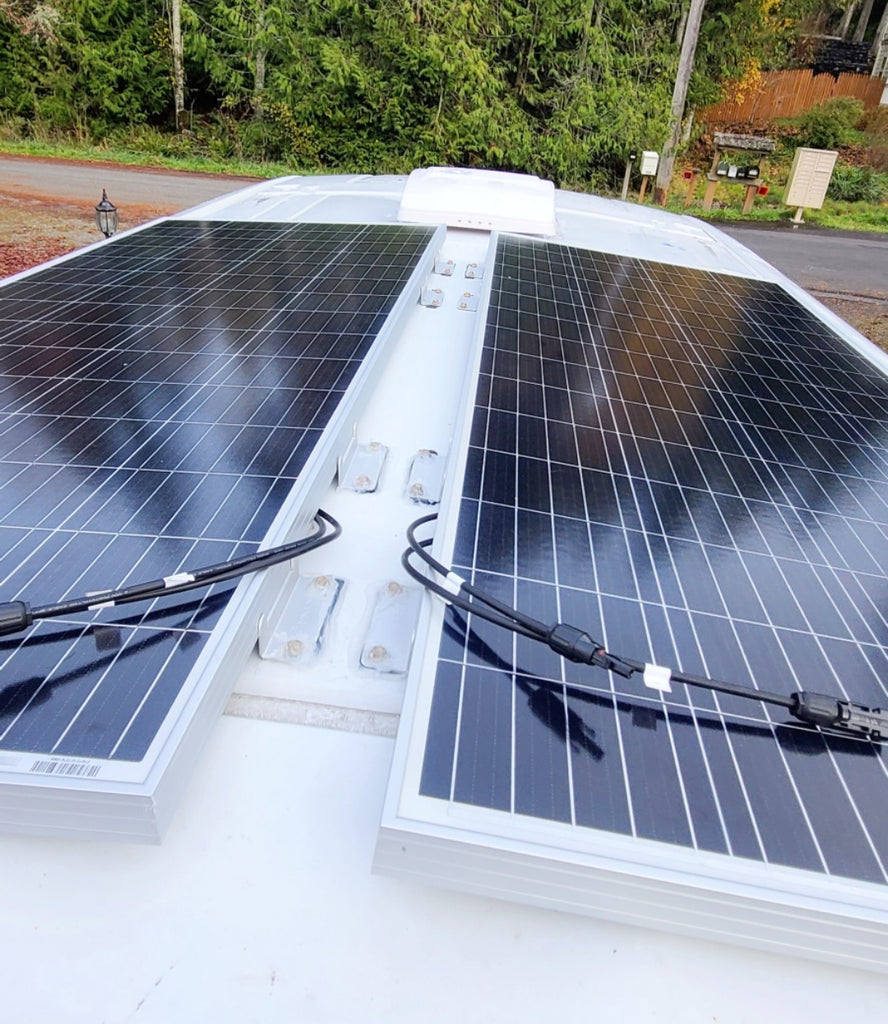
I used 2 sets of Renogy brackets to mount the solar panels directly onto the roof. Each one of my panels needed one set so I purchased two, also recommended by Renogy for the bigger panels. Under the brackets I placed butyl tape, the same as I used for the Maxx Air Fan for extra adhesion and leak protection. Then used a waterproof silicone for extra leak protection, and some Dicor self leveling Lap sealant for even more, haha! I built the van out in Washington state where the PNW had been having record torrential rainfall in the fall/winter of 2021-22. Not ideal for building a van, and it also ended up freezing, but hey, gotta do what you gotta do. Anyways, point being that none of the screw holes from the solar panels have leaked during the two years I've lived in it, so yay!
The next step (not fully shown in video) was to mount the entry gland onto the roof of the van. The video does show where the entry gland was to be mounted. I had to drill a large enough hole to accommodate the Renogy solar wire extension cables that were used to connect the two panels together in series and would then connect directly to the MPPT charge controller inside the van. The purpose of the entry gland is to create a water tight set up for the wires to be connected outside and inside. I chose these prewired extensions versus creating my own. I read plenty of places on how to make your own, but again, keeping it simple was paramount in my DIY van conversion and these Renogy cables are the way to go. I was able to simply pop the connectors directly from the panels into the cable connectors according to the directions of the solar panels and cables and it was easy peasy.
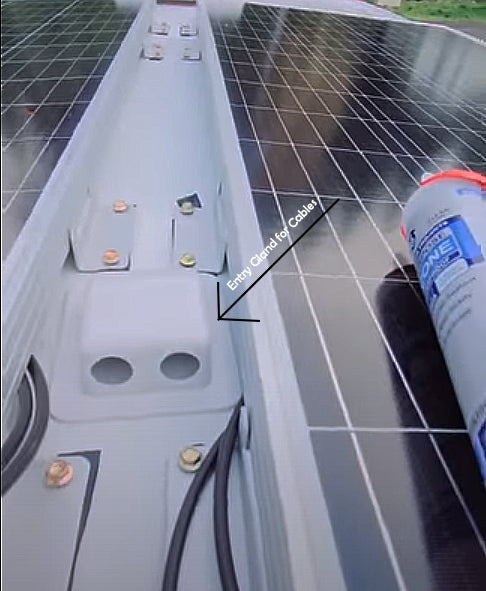
One key thing to note when installing the cables is to mark with tape which side of the end of the cables is positive and which side is negative, because once they have gone through the entry gland and into the van, it will be much more difficult to determine as the cables can twist within the entry gland. Make the tape marks on the ends that connect to the MPPT Charge Controller inside the van. Also be sure that the length of these cables will be long enough to reach your controller, I went with the 10 foot which was perfect as I purposefully mounted the entry gland so that it was as close as I could get to the battery components inside.
Here is a graph from the Renogy Connector Cable listing on Amazon that shows how it connects to solar panels and MPPT Charge Controller.
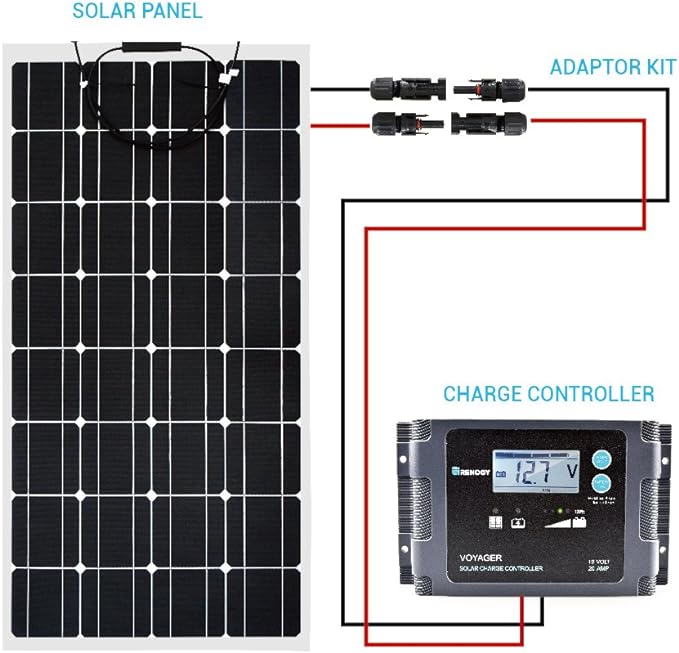
Links to the entry gland and extension cables in the Amazon links below.
Conclusion: As a solo female van lifer and DIY van builder, installing solar power and a roof vent on my van was a scary, but rewarding and empowering experience. By meticulously planning, researching, and executing each step, I was able to create a sustainable and comfortable electrical, solar powered system tailored to my needs. Whether you're embarking on your own van life journey or tackling a DIY project, remember that with determination and resourcefulness, anything is possible, and I hope that my electrical van build blogs serve as an invaluable resource in your diy van conversion. If I ever build out another van I will be using the same system and products as I did here, it works!
The final chapter in this series will be on the wiring process, so sign up for my newsletter for the release of that upcoming blog post.

Here are Amazon links to the components I used for installing my Maxx Air Fan and Solar Panels that I've had for two years and never encountered a single issue. I've created two separate Idea Lists for each install to make it easier for you to get everything you need.
*This blog is a participant in Amazon's Associate's Program, I may receive commission on products purchased through these affiliate links" ~ Visit my storefront here for all your van life needs.
Sign up for the MeganAroon Newsletter for weekly blog updates
Save this blog post to refer to when you are ready to install your roof fan and solar panels ~ You can also use the image below to Pin to your Pinterest board(s) to easily access when you are knee deep in building out your van.